Genesis of 802.11.henryhaller.com
Setting up Ubuntu Server on ESXi
I am VERY lucky to have a powerful ESXi host with some capacity to spare for self- hosting adventures. Over the recent holidays, I have been using some time to setup my own self-hosted services that I am excited to use in the new year.
The basic workflow of setting up Ubuntu Server was fairly uncomplicated:
- Download the ISO
- Upload ISO into an ESXi datastore
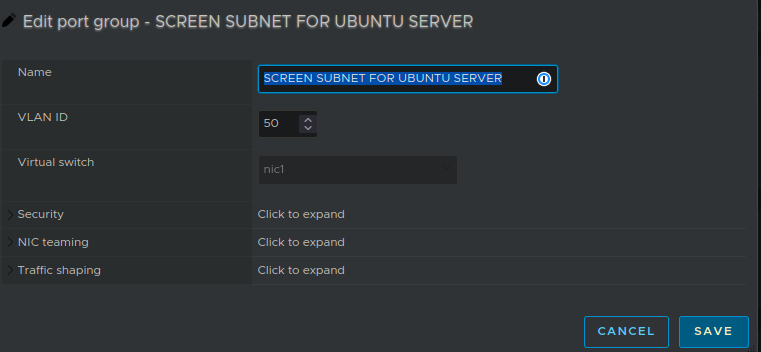
- Create a new Port Group just for connecting this VM's network interface to the vSwitch -- more on this soon
- Run through regular install process. I paused at the update-from-internet step until I was sure I had the network access set up the way I wanted
- Of all the convenient installation pre-select options, I choose
dockerand onlydocker
At the end of this installation, you should have an Ubuntu server VM that you can use to launch the self-hosting platform of your dreams. If you don't happen to have an ESXi host with spare capacity laying around, you could use a bare metal system and just install Ubuntu server onto it directly. I recommend aiming for at least 8 GB of RAM / 4 cores.
If you are planning on self-hosting on an ARM CPU: it might be worth your time to check if the software you want to use supports ARM. I have been disappointed by this kind of situation in the past when I tried to run Dokku + Rails on a raspberry pi.
Here is what my VM looks like in ESXi once it is running as expected.

Networking & Security: How to isolate your VM on Layer 2 and Layer 3
Now to the really fun part! How to isolate and secure the internet-serving Ubuntu VM.
Security is a never-ending process of many little pieces, and no single guide, group of guides or even Whole Course can be eternally definitive in my opinion. But fortunately I am happy to be able to take a LOT of measures to secure 802.11.henryhaller.com
Note: My rXg hardware is a Qotom and my TP-Link hardware is a TL-SG2008P
Layer 2
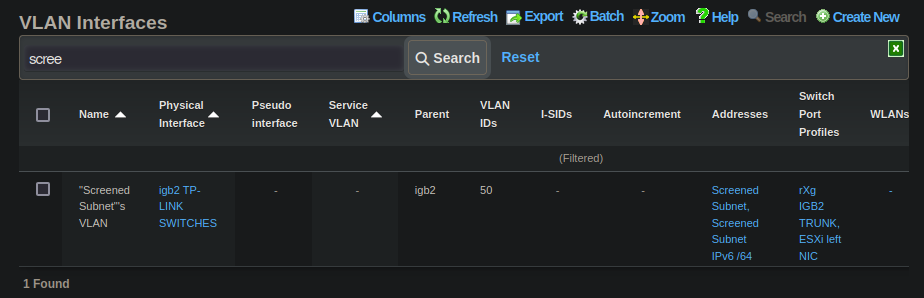
First I logged into my perimeter router, which of course is an RG Nets rXg and created a new Layer 2 VLAN which will be used for this and only this. I named it "Screened Subnets" based on a concept I learned studying for the Network+ exam.
Although subnetting is a layer 3 concept, the sole purpose of this VLAN will be to host screened subnets. For now I will have it host a single /24 IPv4 subnet. This 254-host capable subnet is kind of a large space to waste on one host, but for a SOHO kind of setup where private address space exhaustion is not going to to be a concern, I prefer the simplicity of this setup.
Switching Infrastructure
In order for the L2 tag to circulate between the rXg's physical Ethernet port and the VM's virtual Ethernet port, it must traverse two logical switches. The first is a physical TP-LINK switch, the second is the virtual switch in ESXi.
In order for the tag to arrive at the right port on the first switch, it must go out on the interface of the rXg that is connected to that port. Therefore the "Parent" interface of the VLAN will be the interface of the rXg that is connected to your switching infrastructure. Depending on your setup, it ls likely that many of your VLANs will be "Trunked into" this port if is the primary or only one that is connected to your switching infrastructure.
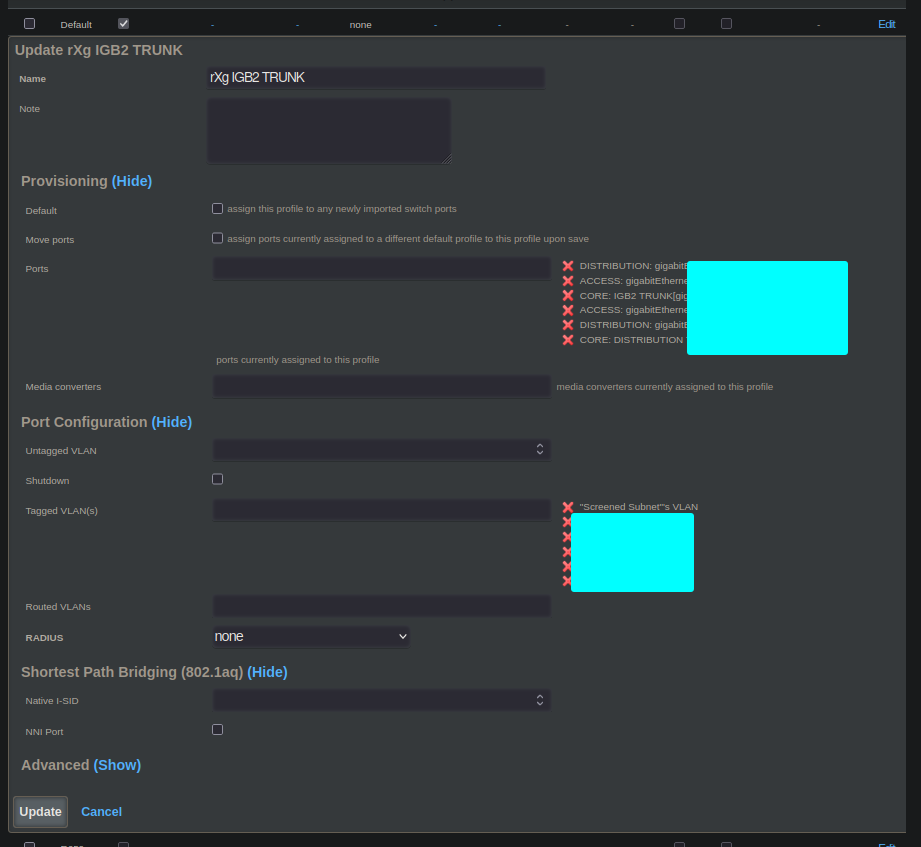
The rXg makes this easy because you can just make a "Trunk Port Profile" with
all your VLANs and associate that to all your trunk ports. In our case, this
trunk port would only come in to play on one port: the port on the switch
that is connected to the rXg's igb2 interface.
The second port of the first switch is the one that connects the TP-Link physical switch to the ESXi host. This is essentially a smaller trunk port which only carries tagged VLANs bound for hosts inside ESXi.
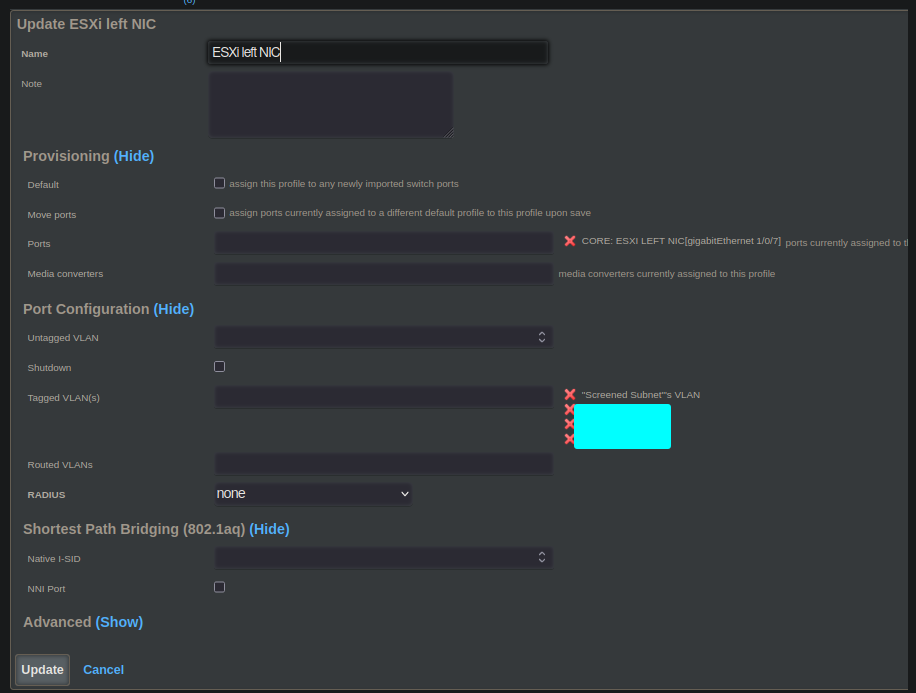
Note that this switch port profile contains a subset of the tags included from the rXg's interface, and that it applies only to the switch port connected to ESXi.
Switching Integration
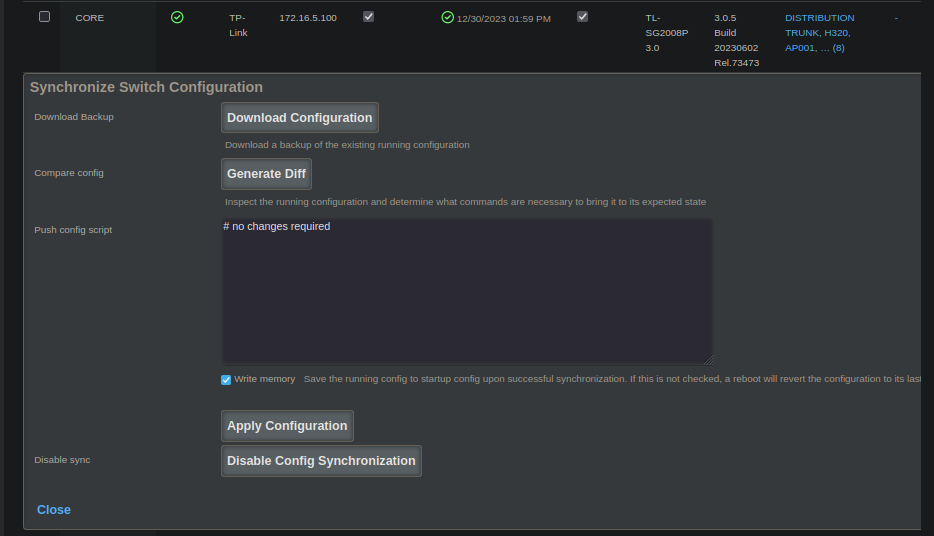
In my lab, every single switch port is managed by my rXg. That means that the rXg keeps command and control of all the switches so that they can be configured from just one place: on the rXg.
ESXi
In ESXi I have configured the VM's portgroup to use the VLAN being sent out from the rXg.
Layer 3
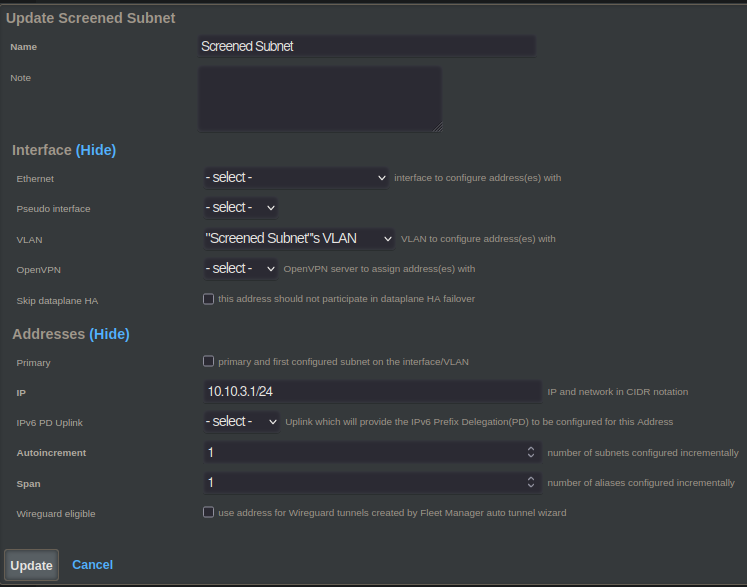
Create a Subnet:
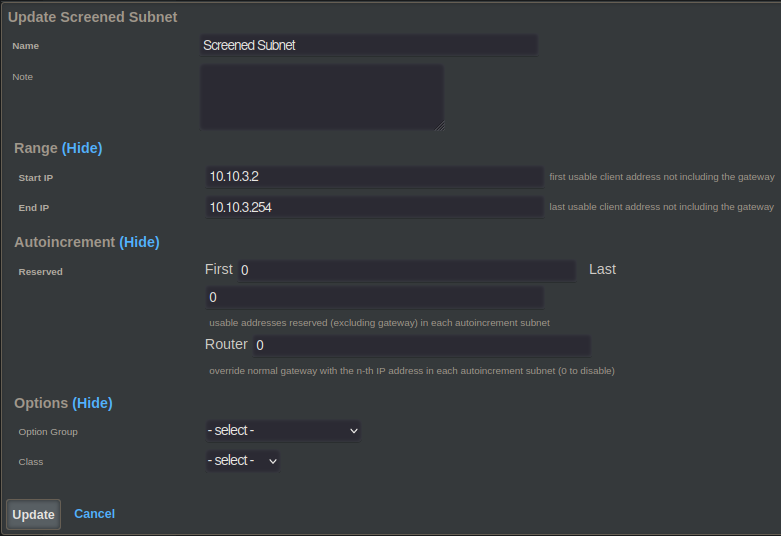
Create a DHCP Pool:
Policy
Create a Policy:
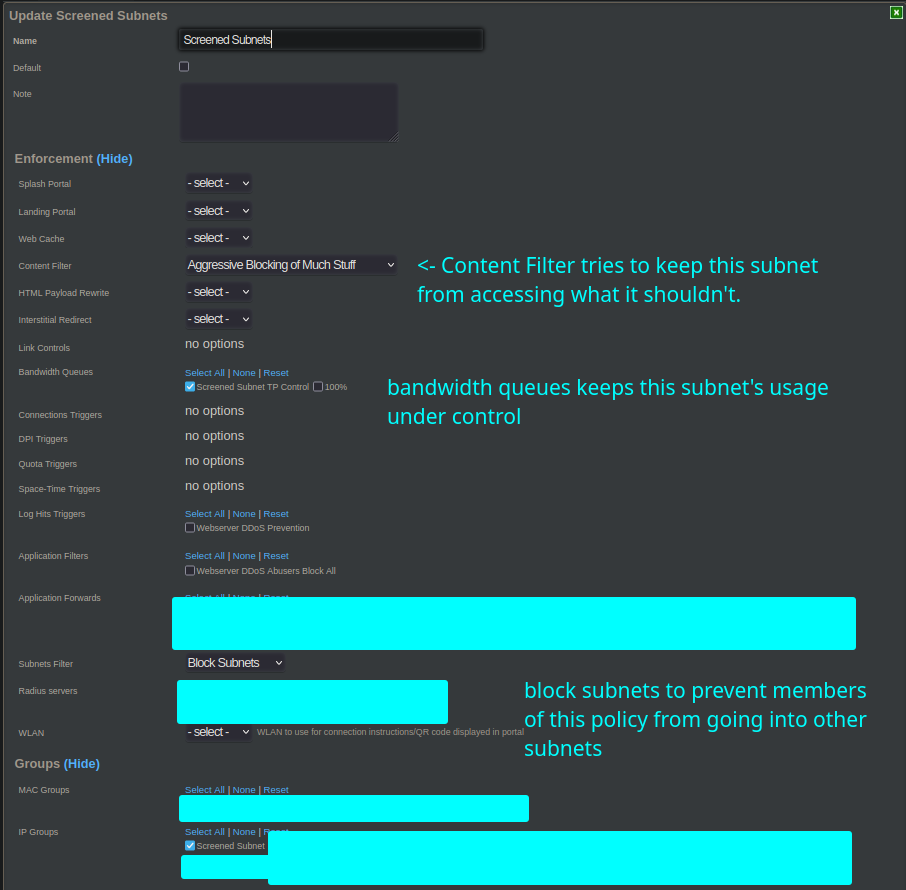
Creating a bandwidth queue and a content filter are a little outside of what I am aiming to address in this blog post, but if you're interested in those I recommend you check out: Traffic Shapping and the rXg.
Building And Serving the blog on Ubuntu Server with Docker
The primary softwares directly used to build and host this blog are:
mkdocs-material(compling the raw source of the blog)nginx(serving the compiled blog)
Both of these run in containerized docker environments that are defined in a compose.yaml orchestration file.
Here is the definition of the mkdocs-material container:
  blog:
    container_name: blog
    image: squidfunk/mkdocs-material
    networks:
      - blog
    ports:
      - "10002:8000"
    restart: always
    volumes:
      - blog:/docs
      - blog-public:/public
This container has two important jobs. First of all, it features live reloading for development, which is very convenient. This helps me easily preview as I type in real time. This live reloading works for text, images, and formatting changes.
Aside from real-time previewing, this package also supports building a compiled
bundle for export. That is why I have a second volume mounted: /public. When I
want to publish an update to the production server of this blog, I simply ask
docker to run and produce a compiled bundle into /public.
EG: docker compose run blog build --site-dir ../public.
I am grateful to the `mkdocs-material`` docker image, this blog would be much more challenging to produce without it!
The second docker container is NGINX itself. This container has only one job: to
serve the compiled bundle produced by mkdocs-material. This means that it can
mount the compiled output from mkdocs-material READ-ONLY, which improves security
because NGINX is not expected to modify anything in the file system.
  nginx-blog:
    container_name: nginx-blog
    networks:
      - nginx-blog
    volumes:
      - blog-public:/usr/share/nginx/html:ro
    ports:
      - "10003:80"
    image: nginx
This is the full definition of the NGINX container that serves the compiled
output that comes from mkdocs-material.
Conclusion
I hope this post gives you some ideas / inspiration for what you could self-host yourself if you want!